Tacoma Raptor Lights | 2nd and 3rd Gen Lights TRD Pro Style Grille
Tacoma Raptor Lights | 2nd and 3rd Gen Lights TRD Pro Style Grille
Original price was: $59.99.$49.99Current price is: $49.99.
-
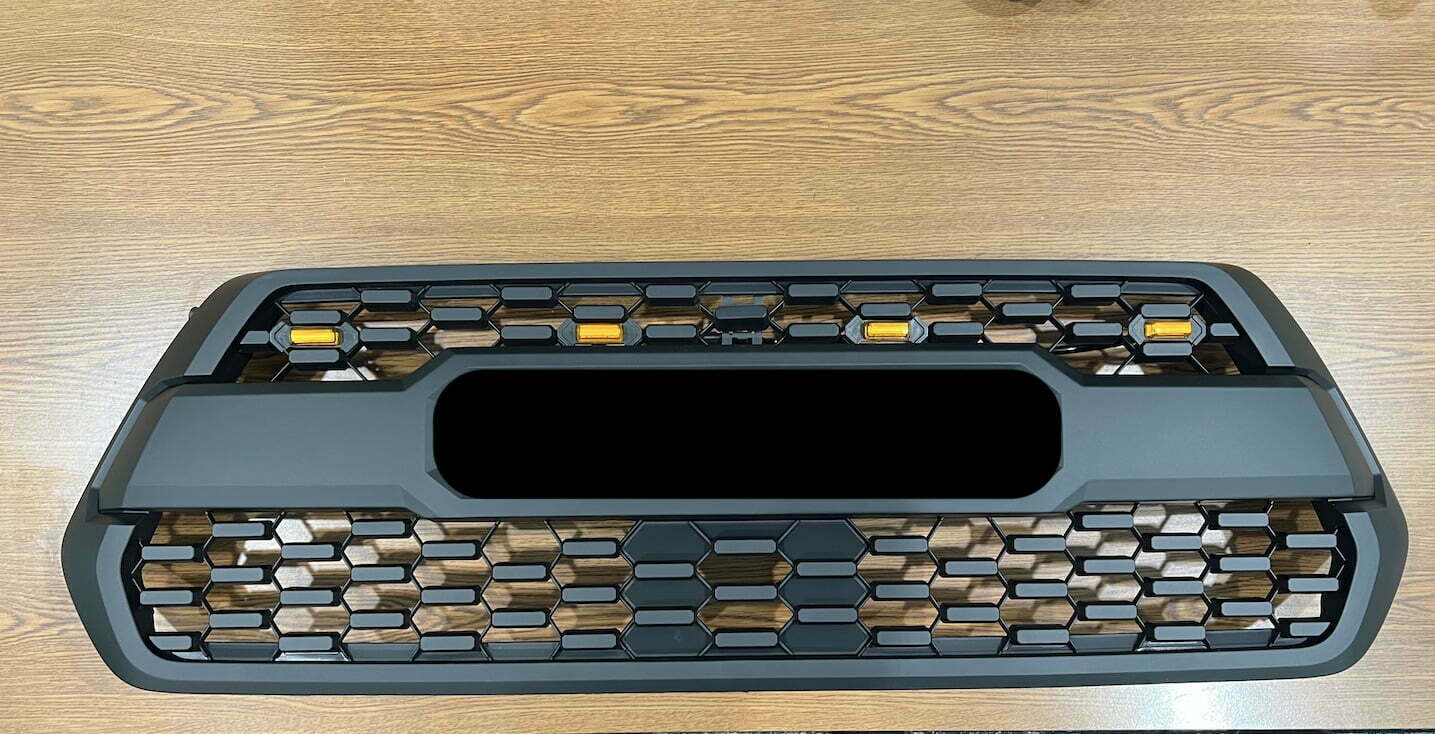
In Stock Ready to ship Tacoma Raptor Lights for TRD Pro Grilles.
Tacoma Raptor Lights Kit Compatibility
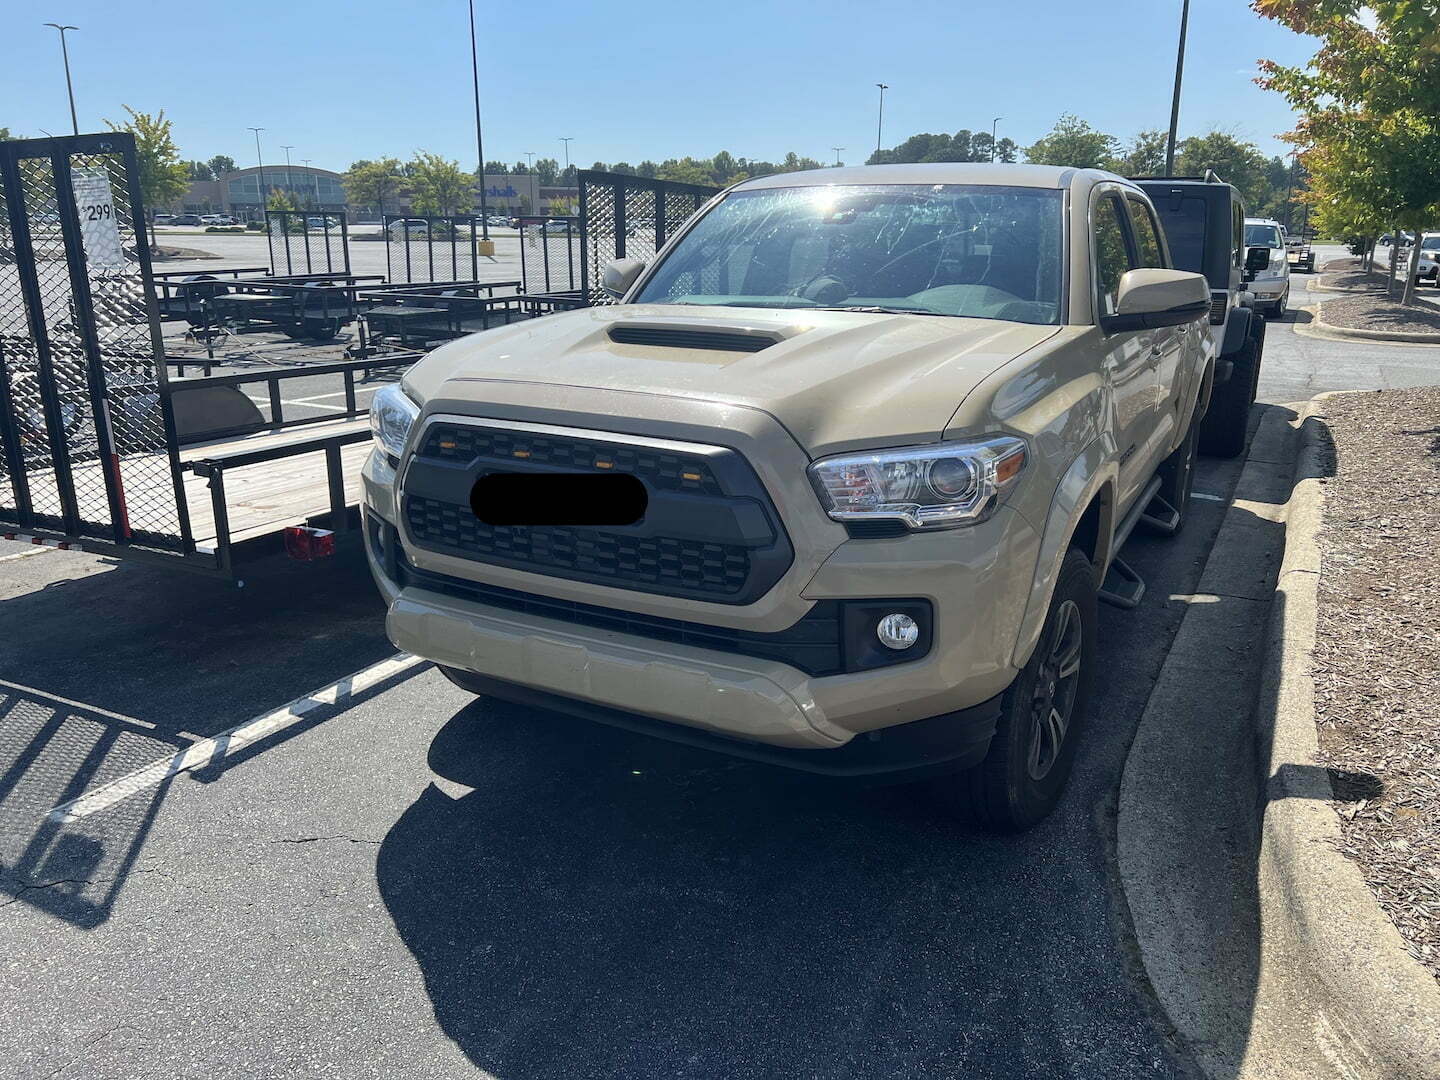
This kit will fit OEM and Aftermarket Grilles for 2016-2019 Tacomas | Will only fit aftermarket grilles for 2020-2023 Tacomas
This kit will also fit 2005-2011 Tacoma grilles sold by High Country Off Road and possibly other brands
Handling Time: 1-3 business DAYS
Estimated shipping time: 2-5 business DAYS
Tacoma Raptor Lights Kit 2005-2011 and 2016-2023
Plug and play kit too quickly and easily install raptor lights on your Tacoma. High Country Off Road offers this lighting kit as a way to take the look of your Tacoma to the next level. This listing is only for the Raptor Style lights. If you are looking for the entire grill insert then follow the links in the next sentence. These lights are designed to fit this 2016-2023 3rd Gen Tacoma Heritage Pro Grill and will also fit this 2005-2011 2nd Gen Tacoma TRD Pro Grille. Lights for the 2012-2015 2nd Gen Tacoma TRD Pro Grill can be found here and the 2nd Gen TRD grill is available here.
Highlights include
- Simple snap in design makes this one of the easiest Tacoma Mods you can do
- Comes with 4 lights
- Add-A-Fuse power connection with connectors installed on wiring
- Water proof connections and car wash safe
- Can be installed in 15 minutes
- 1 year Warranty from date of purchase with free replacement
Available in 4 color options
Original Amber - Amber LED light with an Amber Lens
Smoked Amber - Amber LED light with a Smoked Lens
Clear White - White LED light with a Clear Lens
Smoked White - White LED light with a Smoked Lens
Installation video coming soon!
The process of installation is fairly straight forward though.
- Start by unpacking the contents of your Tacoma Raptor Lights kit. kit will include:
- 4 LED raptor lights of the color you selected
- A wiring harness with 4 waterproof plugs, a spade terminal plug on the black ground wire and a male snap end on the red positive wire
- An Add-A-Fuse block with female snap connector on the end of the red wire
- Once you have verified you have all the components it is time to install the lights in the grille
- You can choose to include 3 or 4 of lights. If you only want 3 lights simply zip or cable tie the 4th connector to one of the other three wires to secure it.
- You can place the raptor lights in multiple areas of the grille so try different spacing before snapping in place to see what catches your eye
- Once you are satisfied with the placement of the lights simply push the lights towards the grille until you hear a click
- Now take the wiring harness and make the 3 or 4 connections to the lights on the back side of the grille
- At this point you can route the wiring around the truck to the battery and fuse panel location. You should be able to find holes in the radiator support that will secure the wiring and also make for a clean instal look by hiding the wiring.
- Once the wiring has been snaked around to the fuse panel area under the hood you can loosen the ground wire bolt on the drivers side fender
- Take the spade terminal plug on the black wire and place it to where it is secured in place when the ground bolt is tightened
- Verify that the wire is secure by lightly pulling to make sure it does not come loose
- To install the positive wire you need to remove the fuse panel cover
- Towards the front of the cover where the main wiring harness comes in there will be a tab you can push that will allow the wiring harness to slide upwards.
- This will leave a gap where you can open the door on the wiring and feed the red end of the wiring harness
- Feed the wire through this gap, close the door, and snap the main wiring harness back in place, Ensure that the wire is not pinched during this process
- Remove the 10 amp fuse that is on the front drivers side of the fuse block and is oriented so that the narrow sides of the fuse are pointing towards the front and rear of the truck. It will be the fuse closest to the fender that is oriented this way. There is a group of 3 10 amp fuses closer to the fender but they are oriented to be in line with the drivers and passenger side of the vehicle, this is not the group of fuses that you need to remove one from. (This is just a suggested area to plug into, use your fuse box diagram to determine the best fuse to use for you)
- Take the male end of the snap connection on the wiring harness and plug it into the female snap connection end on the add-a-fuse, push until you hear/feel them click together.
- Slide the plastic heat shrink over the connection
- Plug the add-a-fuse block into the slot where the 10 amp fuse was removed, and plug the 10 amp fuse into the empty slot on the add-a-fuse block
- Replace the fuse box cover and turn on your ignition to see your new Raptor Lights!
These instructions are only a suggestion and installing this kit is done at your own risk. High Country Off-Road is not responsible or liable for any damage caused to vehicle or person during installation. If you are unsure of what to do consult a local auto repair shop for guidance.
Additional information
| Color | Amber, Smoked Amber, White, Smoked White |
|---|


Reviews
There are no reviews yet.